
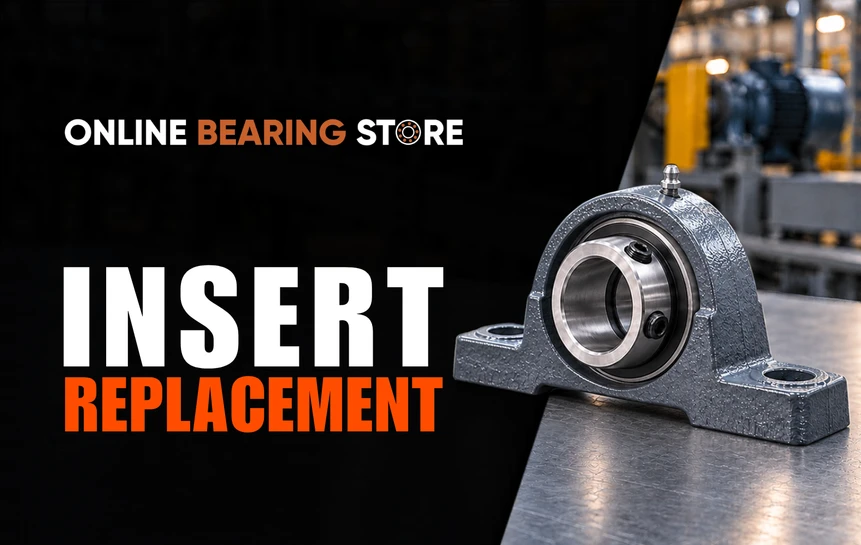
How to Replace an Insert Bearing Without Replacing the Entire Mounted Unit
A conveyor pillow block starts running hot and loud, so the crew orders a whole new mounted unit and the line sits dead for days. Most of the time the housing is fine and only the insert has worn out, so you can replace insert bearing parts in under an hour with a stocked insert. This kind of mounted bearing insert replacement costs less, shrinks your spare parts pile, and lets you skip re-shimming and realigning the mounting base.
Can You Replace Just the Insert in a Mounted Bearing Unit?
Yes, you can on most cast iron pillow block and flange units. The housing has pillow block housing loading slots that let you rotate the insert in and out, so insert bearing replacement never means pulling the whole assembly apart.
How the Insert and Housing Work Together
The insert has a rounded outer ring, called a spherical OD. It sits in a matching rounded seat inside the housing. That shape lets the bearing tilt a little, which helps when the unit isn't mounted perfectly square to the shaft.
The loading slots are two small notches in the housing bore. Turn the insert sideways and its outer ring lines up with them. Then it slides right out. Putting a new one in is the same move backward, and that is the heart of how to replace a pillow block bearing insert.
Benefits of Insert-Only Replacement
- Lower cost. Replacement bearing inserts cost less than a complete mounted unit.
- Less inventory. One housing style can work with several inserts, so you stock fewer parts.
- Your mounting position stays put. The housing stays bolted to the frame.
- Less waste. A good cast housing doesn't end up in the scrap bin, which is smart mounted bearing maintenance.
Visual aid suggestion: a diagram of the housing with the insert turned 90° and lined up with the loading slots.
When Should You Replace the Whole Mounted Unit Instead?
When it comes to insert bearing vs mounted unit replacement, the housing makes the call. Replace the whole unit if the housing is cracked, badly corroded, or worn in the bore. Do the same if it's a pressed steel or other non-serviceable type. A fresh insert in a bad housing will just fail again, and you'll be back at the machine in a few weeks.
Housing Damage That Rules Out Reuse
Check the housing for cracks first, even small ones. Then look at the mounting feet and bolt holes. Broken feet, stretched holes, or deep rust pitting all mean the housing can't hold a load safely. If you wouldn't trust it to carry the shaft, that is when to replace a pillow block housing.
Worn or Oversized Housing Bore
Look inside the bore. A shiny, polished ring or fine grooves usually mean the old insert was spinning in its seat. Once that happens, the seat is too big. A new insert won't grip it, whether you're planning flange bearing insert replacement or working on a pillow block. We cover this problem in our article on diagnosing a bearing that spins in its housing.
Non-Serviceable Units
Pressed steel units and some sealed units that can't be relubricated are made to be replaced as one piece. Many don't have loading slots or a swappable insert at all. Good mounted bearing maintenance starts with knowing which units you can service and which you can't. For the ones you can't, buy the complete unit.
Repair-or-Replace Decision Table
|
Housing condition |
What to look for |
Recommended action |
|
Clean, intact bore |
No scoring, no polish, no cracks |
Replace insert only |
|
Light surface rust |
Rust that wipes or sands off |
Clean it, then replace insert only |
|
Polished or scored bore |
Shiny ring, grooves, loose fit |
Replace complete unit |
|
Cracked housing |
Any visible crack |
Replace complete unit |
|
Damaged feet or bolt holes |
Broken, stretched, or cracked mounts |
Replace complete unit |
|
Heavy corrosion |
Deep pitting or flaking metal |
Replace complete unit |
|
Pressed steel or sealed unit |
No relube feature, no loading slots |
Replace complete unit |
How Do You Choose the Right Replacement Insert?
Match the series, size, outer shape, and locking method of the old insert, then check that it fits your housing. Close isn't good enough. When you shop for replacement bearing inserts, the fit has to be right.
Match the Series and Size
Read the markings on the old insert and the housing. They give you the series and the bore size. If the marks are worn off, measure the bore and the outer ring. Our series designations article explains the codes. You can also send us a photo and we'll help.
Confirm Housing Fit
Check three things: the spherical OD, the inner ring width, and where the relubrication hole or groove sits. Standard dimensions often let parts swap between brands. Still, check against your actual housing, because small differences in fit do exist. Mounted bearing insert replacement goes best when the insert and housing come from the same maker. If the old insert had an anti-rotation pin on the outer ring, the new one needs to seat with that pin in the housing slot.
Keep the Same Locking Method Unless There Is a Reason to Change
Stick with what you have, whether that's set screw, eccentric collar, or adapter sleeve. The same lock type keeps set screw bearing removal and eccentric locking collar removal familiar for your crew the next time around. If you think a switch makes sense, talk to a specialist first. Our locking systems article walks through the options.
Printable Insert Compatibility Checklist
Take this to the machine:
- Series and part number from the old insert
- Bore (shaft) size
- Spherical OD matches the housing
- Inner ring width matches
- Locking method: set screw, eccentric collar, or adapter sleeve
- Relubrication hole or groove in the right spot
- Anti-rotation pin, if the old insert had one
- Seal type (contact seal, shield, or open)
- Housing style: pillow block or flange
- A phone photo of the old insert and its markings
What Tools and Prep Do You Need Before Starting?
You need basic hand tools and a safe setup. Safety comes first every time. Never pull an insert from a machine that's running or under load. Gather everything below before you start how to remove an insert bearing from a housing.
Tools: hex keys, a spanner wrench or drift punch for eccentric collars, wrenches for the mounting bolts, a puller if the unit is stuck, emery cloth, clean rags, a grease gun with compatible grease, and a torque wrench.
Prep:
- Lock out and tag out the equipment.
- Release belt or chain tension.
- Support the shaft so it can't sag.
- Mark the housing position on the frame.
That last mark takes ten seconds and saves you a lot of fussing at the end. It's a small habit that makes mounted bearing maintenance easier.
How Do You Remove a Worn Insert Bearing from Its Housing?
Lock out the machine, loosen the shaft lock, slide the unit off, then turn the insert 90° and lift it out. That's how to remove an insert bearing from a housing in a nutshell. Take your time, because each step protects the shaft and the housing.
- Lock out and tag out the equipment. Why it matters: A machine that starts unexpectedly can cause serious injury. Confirm zero energy before you touch anything.
- Loosen the locking device. For set screw bearing removal, back out both set screws. For eccentric locking collar removal, tap the collar against the direction of shaft rotation and take it off. For an adapter sleeve, loosen the lock nut. Why it matters: The insert has to let go of the shaft before anything else can move.
- Unbolt the unit and slide it off the shaft. Clean up burrs and set screw marks first so it slides freely. Why it matters: Forcing a stuck unit can scar the shaft.
- Rotate the insert 90° until it lines up with the loading slots. Why it matters: The outer ring only clears the housing when it matches the slots.
- Lift the insert out of the housing. Why it matters: A clean exit keeps the seat in good shape for the new insert.
Visual aid suggestion: a photo sequence showing each removal step.
How Do You Inspect the Housing and Shaft Before Reinstalling?
Clean the bore and check it for damage, then check the shaft. Skipping this step is the fastest way to ruin an otherwise good insert bearing replacement. If either part fails, go back to the decision table above.
Housing Bore Check
Wipe out the old grease and any grit. Look for scoring, polished spots, cracks, and fretting. Fretting shows up as fine, rusty-colored dust and means two parts have been rubbing. Run a clean fingertip around the seat. It should feel smooth and even. A quick look like this is simple mounted bearing maintenance that pays off.
Shaft Check
Sand off burrs and set screw dents with emery cloth. Look for wear and make sure the shaft is still within its proper size tolerance. Then wipe it clean. A rough or worn shaft can shorten the life of a brand-new insert.
How Do You Install a New Insert into an Existing Housing?
Turn the new insert 90°, slide it through the loading slots, and rotate it upright into the seat. Then mount the unit and lock the insert to the shaft, in that order. Here is how to replace a pillow block bearing insert from start to finish, and the same steps apply to flange bearing insert replacement.
- Turn the new insert 90° and slide it into the housing through the loading slots. Why it matters: The pillow block housing loading slots are the only safe way for the outer ring to enter the seat. If the fit is snug, go slow. Forcing it can dent the raceway.
- Rotate the insert upright into the spherical seat. Why it matters: It has to sit evenly to self-align.
- Line up the relubrication hole with the grease fitting, where it applies. Why it matters: Grease needs a clear path to the bearing.
- Slide the unit onto the shaft without hammering on the outer ring. Move it to your frame marks and snug the mounting bolts by hand. Why it matters: A hammer blow can leave hidden damage that shows up as noise a week later.
- Lock the insert to the shaft. For set screws, tighten them to the manufacturer's torque spec. For an eccentric collar, turn it in the direction of shaft rotation and tighten its set screw. For an adapter sleeve, tighten the lock nut. Use the manufacturer's torque chart for your insert size. If you can't find it, our technical team can help. Why it matters: A loose lock lets the shaft spin inside the insert. Too tight can distort the bearing.
- Torque the mounting bolts and confirm shaft alignment. Why it matters: Misalignment adds heat and wear quickly.
Visual aid suggestion: place the loading-slot diagram here to show how the insert enters and rotates into place.
What Should You Check After Installation?
Add the right amount of grease, spin the shaft by hand, and watch the unit during its first run. Then check the fasteners again once it has settled in. These checks finish off any insert bearing replacement the right way.
- Grease it. Use a compatible grease and don't overdo it. Too much grease builds heat and can push past the seals.
- Spin it by hand. Feel for binding or rough spots.
- Run it in. Watch temperature, noise, and vibration. A little warmth early on is normal. A hot or loud unit isn't.
- Recheck. After the initial run-in, go back and check the set screws and mounting bolts. Steady follow-up like this is the core of good mounted bearing maintenance.
What Mistakes Should You Avoid When Replacing an Insert Bearing?
The big ones are reusing a bad housing, buying the wrong insert, and never finding out why the first one failed. Most repeat failures come back to one of those when you replace insert bearing units.
- Reusing a worn housing. If the old insert spun, the seat is probably oversized. Know when to replace a pillow block housing before you start.
- Mismatching the insert and housing. The wrong series or OD won't seat right.
- Hammering on the outer ring or seals. The damage is easy to cause and hard to see.
- Locking the set screws too early. Set the final position first, then lock.
- Using the wrong torque. Too loose and too tight both cause trouble.
- Misaligning the lube hole. Grease has to reach the fitting path.
- Skipping the root cause. Misalignment, poor lubrication, contamination, overload, and a loose shaft fit are all common culprits. Fix the cause or the new insert may go the same way.
Where Can You Find Replacement Inserts and Mounted Units?
Online Bearing Store carries inserts, housings, and complete mounted units, so you can get everything for the job in one order. That makes mounted bearing insert replacement simple, whether you need one part or a full set.
Replacement Inserts
Shop set screw, eccentric collar, and adapter sleeve inserts in standard series and sizes. Our replacement bearing inserts cover the most common shaft sizes.
Housings and Complete Mounted Units
If your housing fails inspection, pick up a matching housing or a full mounted unit. That's the safe move in any insert bearing vs mounted unit replacement decision where the housing is damaged.
Expert Support
Can't read the markings on the old insert? Not sure about housing fit? Our technical team can help you identify the part and confirm the match.
Frequently Asked Questions
1. Can you replace just the bearing in a pillow block?
Yes. Most cast iron pillow blocks let you swap the insert on its own. Check the housing first and replace the whole unit if you find cracks or a worn bore. That's the key point in insert bearing vs mounted unit replacement.
2. How long does it take to replace an insert bearing?
Often under an hour once the machine is locked out and you have the right part in hand. Stuck units, rusty shafts, and hard-to-reach spots can add time to any mounted bearing insert replacement.
3. Can you put any insert into any housing?
No. The insert has to match the housing in series, spherical OD, and width. Many brands share standard sizes, but small differences exist, so confirm the fit before you order replacement bearing inserts.
4. How do you know if a housing is too worn to reuse?
Look for cracks, broken feet, heavy rust, and a shiny or scored bore. Any of those tells you when to replace a pillow block housing. When you're unsure, replace the whole unit.
5. Do you have to realign the shaft after replacing an insert?
You should always confirm alignment after you reinstall the unit. If you marked the housing position before removal and return it to those marks, alignment is usually much easier.
6. How tight should the set screws be?
Don't guess. Use the manufacturer's torque chart for your insert size. If you need help finding it, contact our technical team.
7. Can you switch from a set screw insert to an eccentric collar insert?
Sometimes, but treat it as a deliberate change, not a casual swap. The two lock types seat on the shaft differently. Talk with a specialist before you switch, and plan for different set screw bearing removal and eccentric locking collar removal steps next time.
8. How much grease should you add after installing a new insert?
Add a small amount of compatible grease and stop there. Over-greasing causes heat and can damage seals. Check the manufacturer's guidance for your unit.
9. Why did my new insert fail so fast?
Common causes include a worn housing, the wrong insert, poor lubrication, misalignment, and a lock that was too loose or too tight. Find the root cause before you restart the machine.
10. Can you replace the insert in a flange bearing the same way?
Yes. Flange bearing insert replacement works like it does on pillow blocks. Rotate the insert 90°, line it up with the loading slots, and lift it out. Install the new one in reverse.
Ready to Get Your Equipment Running Again?
A failed insert doesn't always mean a failed unit. With the right part and a careful process, you can get your line moving again and keep a good housing in service.
Shop replacement inserts and mounted units at Online Bearing Store or contact our technical team and we'll help you match an insert to your existing housing.